Monday, April 25, 2022

#907 OIC & OAuth 2.0 Part 2


This is what I hope to implement over the next 2 posts. 


Here I restrict access to OIC endpoints, using OCI API Gateway. The flow is as follows - 
Client invokes API with OAuth token for the API.  API Gateway receives the token and then invokes a custom authorizer function. This function validates the token, then retrieves the OIC token. This is returned to API Gateway, which then replaces the original token in the request header. The request is then routed to OIC.

A big thank you to my colleague Valeria Chiran for her support here!

The previous post covered the OAuth setup at IDCS level. It ended with a test of the OIC endpoint from Postman, using the access token retrieved from IDCS. 
OIC customers value OCI API Gateway for many reasons, including the following -

1. Endpoint Virtualisation

2. Making it easy to expose a subset of integration endpoints to various clients - this could include 3rd parties.

3. Easy integration with 3rd party identity providers.

4. Ability to leverage a rich set of API Gateway policies - rate limiting etc.

For me, the focus will be on granting access to the following integrations -


AA-Salary-Test-MV supports multiple verbs - GET (get the salary based on empid) and PUT (update salary based on empid).

The rules are very simple - I have 2 sets of clients - users and admins. The users can read salary info, the admins can update salary info. 

Net, net - users should be able to invoke the OIC integration AA-SALARY-USERS as well as the GET on AA-SALARY-Test-MV. The admins should be able to invoke all endpoints. Let's begin by looking at the multiple verb integration - 


Let's agree to use 2 different scopes to enforce the rules - _userScope and _adminScope.

Many OIC customers require something similar, e.g. different trading partners requiring access to different sets of integrations. I have greatly simplified things here with my 3 integrations, but they will suffice to demonstrate the value-add of the combination API Gateway / IDCS.  

Deploy the multi verb integration to API Gateway


Check out the routing rules - 


Add a new routing rule /version


Try invoking /version from Postman -


Note no auth has been set.

Back to the API Gateway - let's secure the api by setting the authentication as follows - 


Note the use of IDCS as the Issuer.


Click Show Advanced Options -

Here I add my 2 scopes -


Validate in IDCS that clients can access the signing certificate - specified above in the Public Keys section.


Now we move to IDCS... 

Creating the required applications in IDCS

This is where the magic happens - 


Let's go thru these individually - 

AA-Salary-application - this takes care of the resources/scopes.


Note the definition of the 2 scopes _userScope, _adminScope.

AA-Salary-application-admins - this is specifically for admin clients.


Note the scope setting - anyAudience_adminScope

This is a concatenation of ALLOWED AUDIENCES and the relevant CLAIM VALUE.

Think back to the Authentication definition in API Gateway - 


A client Id and secret are generated. 


I do the same for the users - AA-Salary-application-users - same as the above except for - 


I also save the client id and secret generated - 


I test the /version endpoint again from Postman - 


As expected - Unauthorized.

Now I add the OAuth client details from the "users" app -


Token config is as follows - 


Access Token URL set to https://myIDCSURL/oauth2/v1/token

So now we have successfully tested limiting access to only authorised clients - OAuth 2.0 Authorization on OCI API Gateway, courtesy of IDCS.

I now publish the 2 remaining OIC endpoints to API Gateway -

Beginning with the admin only integration - AA-Salary-Admins -


Here I add the same Authentication rule - 


I add another route - /version - with the same stock response as in the previous example.


I test this with the client credentials from user


Now with the admin credentials - 


Summary

This post has shown how easy it is to protect API Gateway apis via OAuth 2.0. It detailed the resources required at IDCS level to make this work. Next step is to create the IDS app for OIC access as well as the custom authorizer function - work for the next post!


Thursday, April 21, 2022

#906 OIC with OAuth 2.0

More a note for myself, but maybe interesting for others. I want to invoke an OIC integration that is protected by OAuth. 


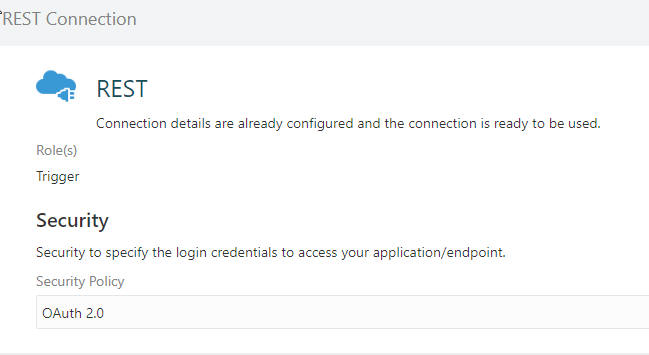
My REST connection is defined as follows - 


I create a simple synchronous integration using this connection - 


I test this in OIC -


Next step is IDCS for the OAuth setup etc. Here I begin by creating a confidential application - 


click Next -
Set the following Authorization values - 


Add your OIC instance as a Scope -


Click Next

Primary Audience is set to your OIC host, without the /ic/home


Click Next


Click Next


Client ID and Secret are displayed - save these locally -


Activate


Next steps are well documented here

Get Authorisation Code - 

https://<idcs_URL>/oauth2/v1/authorize?client_id=<client_ID>&response_type=code&scope=<scope> offline_access&redirect_uri=<URL_to_receive_response>

my url - 


https://myIDCSURL/oauth2/v1/authorize?client_id=myClientId&response_type=code&scope=myScope offline_access&redirect_uri=https:/myOICURL/icsapis/agent/oauth/callback

Scope can be found in the IDS app configuration - where you added the scope for your OIC instance.

I enter the url in a browser and am then prompted to login to OIC -


I am only interested in the code returned in the url - 

https://myOIC/icsapis/agent/oauth/callback?code=myCode

The code is required to get an Access Token -

Next step is to Base64 encode the client id and secret.

I just follow the instructions from the doc -


Now to getting the access token - 
I had to amend the curl cmd from the docs slightly - 

curl -i -H "Authorization: Basic myBase64EncodedCredentials" --request POST "https://myIDSCUrl/oauth2/v1/token" -H "Content-Type:application/x-www-form-urlencoded" -d "grant_type=authorization_code&code=myCode


Now I have the access token, let us use it in an invoke - here I use Postman - 


Thanks to my colleague Valeria C. for pointing out I could also use OAUTH Authorization in Postman. This is, in fact, simpler - here is my configuration -


The values above are as follows - 
Token Name - name of your choice
Grant Type - Authorization Code
Callback URLhttps://yourOICInstanceURL/icsapis/agent/oauth/callback
Auth URL - https://yourIDCSInstanceURL/oauth2/v1/authorize
Access Token URL - https://yourIDCSInstanceURL/oauth2/v1/token
Client Id - your client id
Client Secret - your client secret
Scope - https://yourIDCSOICScopeURL:443urn:opc:resource:consumer::all

A future post will cover publishing this OIC api to the OCI API Gateway and then have API Gateway inject the token into the client request. 


Wednesday, April 13, 2022

#905 OIC Responsys Adapter

Oracle Responsys Campaign Management is a cross-channel campaign management platform that delivers advanced intelligence at scale so you can create personalized messages based on the individual interests and preferences of customers and prospects.


OIC plays a major role in ensuring customer data is made available to Responsys from a wide variety of sources - e.g. Oracle commerce Cloud, SFDC etc.

The usual caveat applies here - I am not a Responsys expert.

But hopefully this post will show how easy it is to import data into Responsys using OIC.

Step 1 is to create the target in Responsys - 


Here I need to create a new Profile List


I just accept the default fields - 


Note the ability to add new fields.

So that's my target taken care of, now to OIC - 

Step 2 - Create a Responsys Connection in OIC - 


I configure as follows - 


Step 3 - Create a Simple Contact Import Integration 


The Trigger is REST based and configured as follows -

Request Payload - 


Response Payload - 


The Responsys adapter invoke is configured as follows -


Now to the Mapping - 

here I map the REST trigger request payload to the Responsys target -


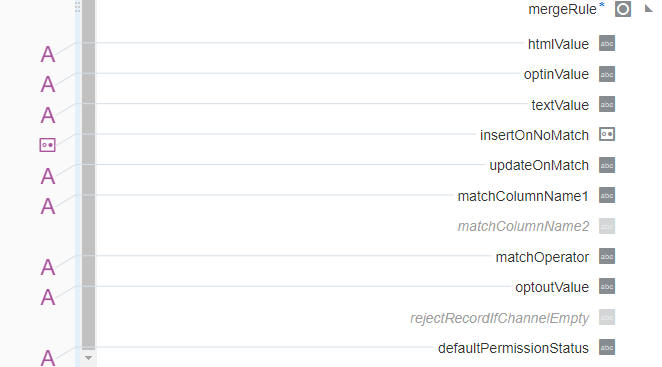
There are 2 structures in the target, record data and merge rule. record data refers to the contact data I want to sync.


The merge rule data contains control meta data -


Note how these fields have been hardcoded - I will externalise this to an OIC lookup later.

Finally, test...

Step 4 - Test the Integration


Validate in Responsys -


Regarding hard coding the default values - I got the relevant values from the Responsys REST API docs.


Step 5 - Build Campaign in Responsys