This post covers a couple of points related to accessing OIC 3 via OAuth. To begin with, this is now the default authorization method for the connectivity agent.
In this post I will detail how to invoke integration endpoints using OAuth. I will also cover invoking the OIC 3 "Factory" apis via Oauth.
There have been a couple of minor changes in the OIC REST api compared to gen2. These are covered in the OIC 3 api docs are here.
Just as a refresher, the OAuth authorisation flow is as follows -

For the purpose of this post, I create a vanilla OIC 3 instance and then begin with the Connectivity Agent install, which includes a quick overview of the OIC 3 app OAuth setup.
But before we do, let's look some of the OIC3 URLs -
The Service Console URL has the following format -

https://design.integration.us-phoenix-1.ocp.oraclecloud.com/?integrationInstance=yourGen3InstanceName-yourTenancy-yourRegion
This takes me to the OIC home page, the gen3 version of the gen2 /ic/home

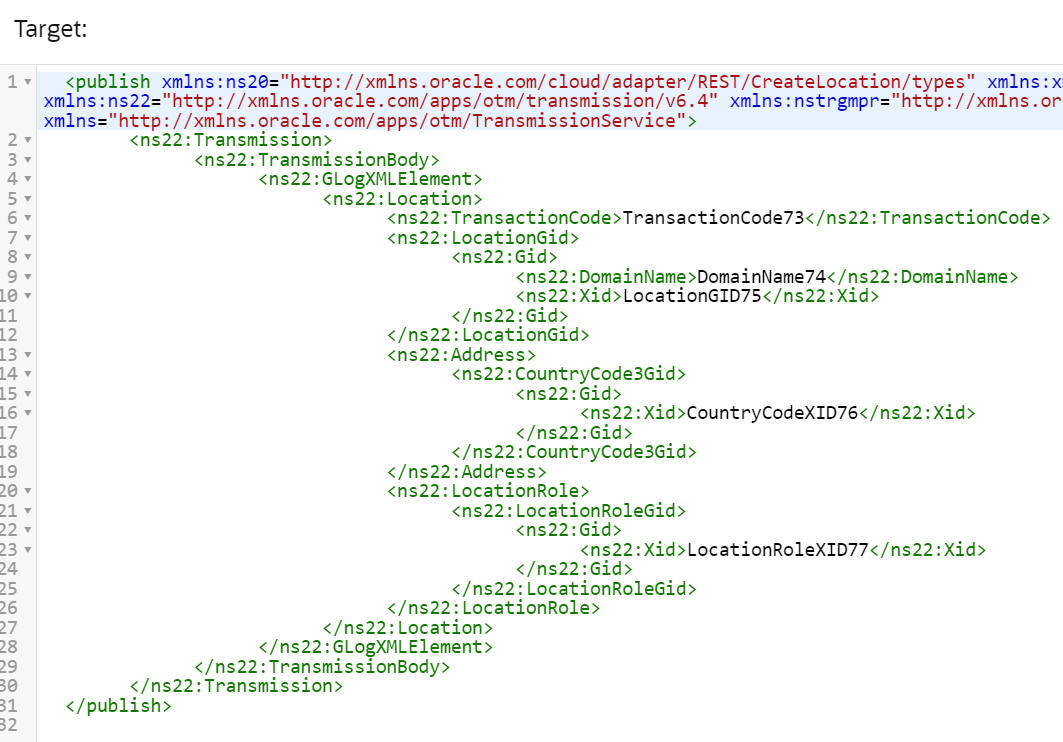
I create a simple REST based integration and check out the Endpoint Metadata for it -

The format here is -
In this post, the first URL will be referred to as the Home URL, the second, the Endpoint URL.
Now to the OAuth setup.
OAuth Setup
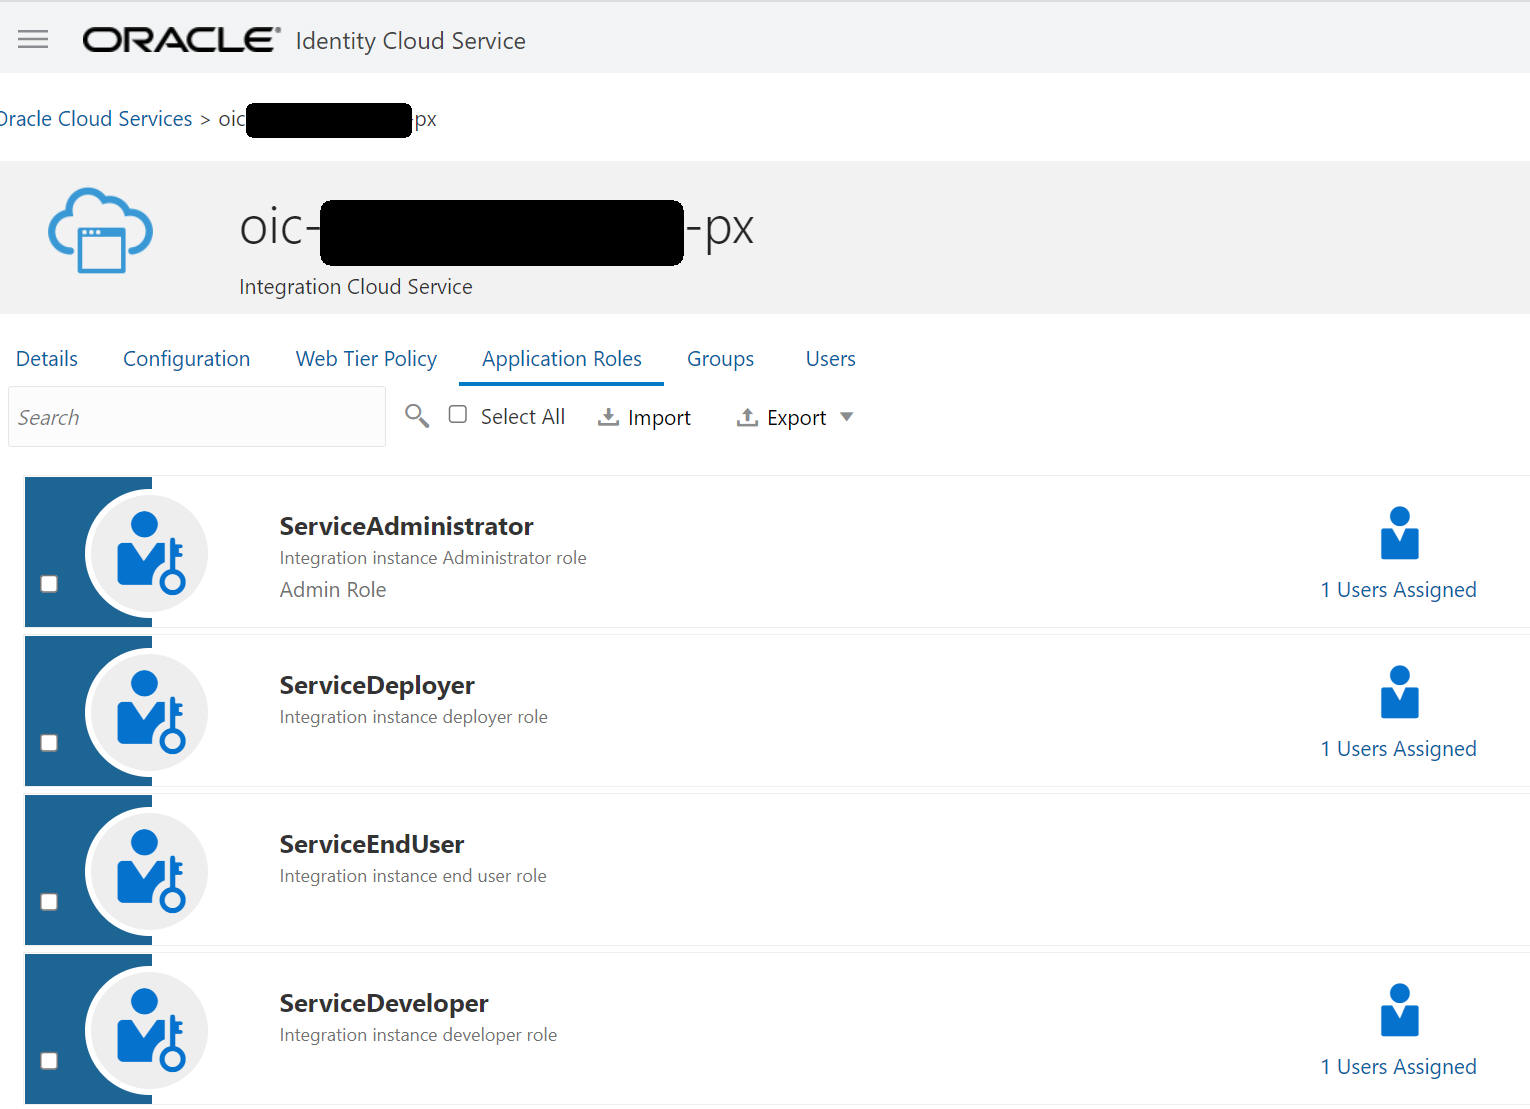
Newly created OIC 3 instances surface in IDCS under Oracle Cloud Services. Let's check out that entry -


Click on the console link - then select Oracle Cloud Services - select your OIC instance

Check out the credentials -

Copy and save Client id/Secret -
Also, check out the Client Configuration -

As already mentioned, the connectivity Agent now runs on OAuth. Let's install it.
OIC 3 Connectivity Agent Install
I create an agent group - AA-Agent-Group in my new OIC instance and then download the Connectivity Agent -

Essentially the same data will be needed when making the OIC api calls from Postman.
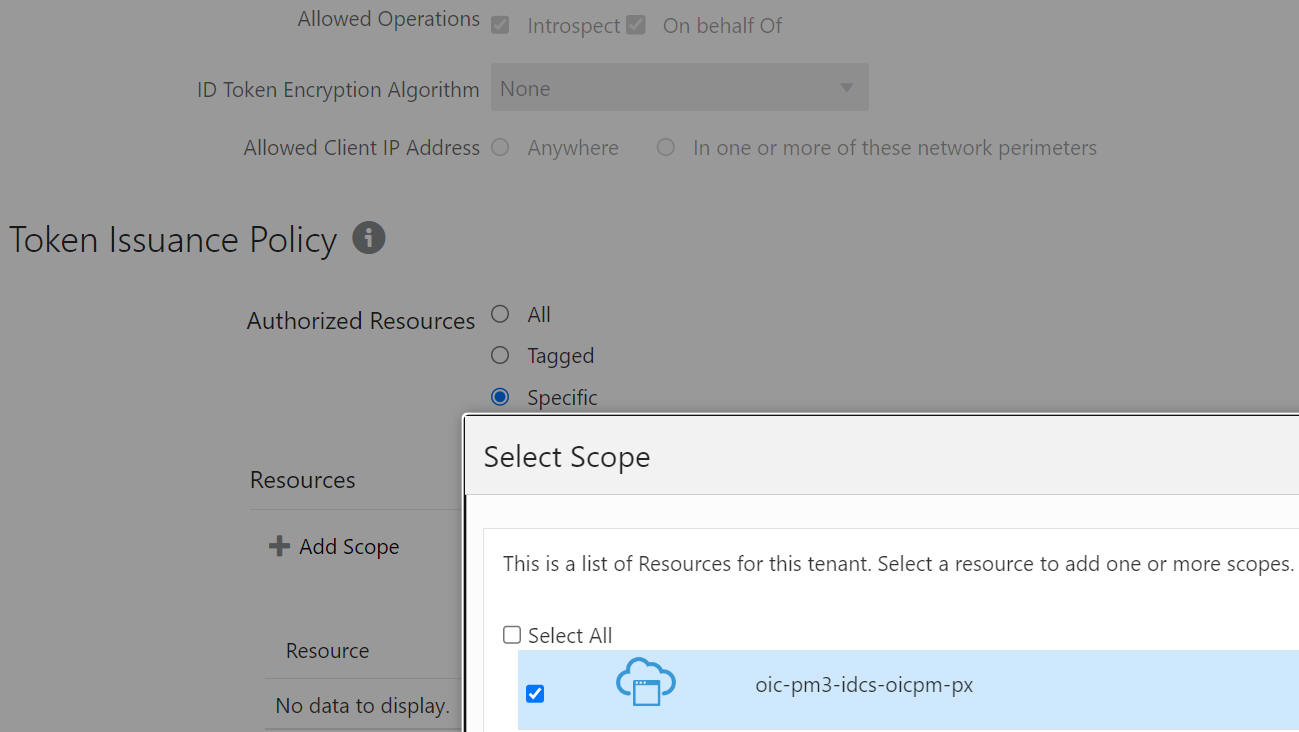
Let's populate the InstallerProfile.cfg - the oic_Scope value can be found here in the IDCS created for our OIC instance -

The oic_URL value is set to the hostname of the Endpoint url shown earlier.


I install the agent -

Looks good - now to the next step -
Here I create a new confidential app in IDCS - it will be configured in a similar way to the default entry we just looked at.


Redirect URL has the following format - https://hostname from EndpointURL/icsapis/agent/oauth/callback
Note, I also added the 2 scopes from my OIC instance resource.
I get the clientId/Secret once this new confidential app has been saved/activated.
Calling the OIC apis from Postman
Now to actually testing the REST API -
First test is for the integration endpoint, my AA-REST-Test demo integration.
The Postman Authorization setup is as follows -

Callback url - set as in the IDCS confidential app
Auth url - https://yourIDCSUrl/oauth2/v1/authorize
Access Token url - https://yourIDCSUrl/oauth2/v1/token
ClientId/Secret - from the new IDCS confidential app
Scope - same scopes as used in the new IDCS confidential app, separated by a space.


Looks good! Now to the OIC Factory APIs, let's list all integrations in the instance - I check out the OIC3 REST API docs here and see -

Back in Postman, I now use the "Home" url -
https://design.integration.us-phoenix-1.ocp.oraclecloud.com/ic/api/integration/v1/integrations?integrationInstance=myInstance
OAuth setup is exactly the same as above -