with Oracle SOA Suite 11g.
In this simple scenario we will process a purchase order via Mediator - BPEL -Human Workflow-File Adapter(Write2File)
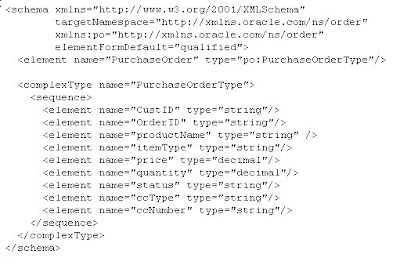
The xsd is as follows -

Start JDev and create an empty composite -
1. Create a New Application of type SOA
2. Composite template = Empty Composite
3. Add a Mediator component. Template = 1 way interface. Check the checkbox "Create Composite Service with SOAP bindings". Set the input type to purchase order.

4. Add a BPEL component - ProcessOrder

5. Wire the Mediator to the BPEL process

6. Create the transformation in the Mediator

7. Add an Assign activity to the BPEL process. In this first draft I simply
assign input to output and then set the

8. Deploy and Test

7. View audit trail

Very nice overview, but still no easy way to find out what has happened to order nr "123" for example.
8. Return to JDev and add a composite sensor (skittle icon)

9. Set as follows -

10. Re-deploy and Test

11. Click on the Instances tab

12. Click on the "Add Fields" button and select the sensor we just created

13. Search for Order Nr "1234"


No comments:
Post a Comment